
Done! Translated on 15-May-2001
This type of photography is more acurately called Stenopeic Photography.
A pinhole is the simplest photographic camera possible. It's also usefull to demonstrate one
the the basis of photography.
By definition, a photographic camera is a dark camera with a hole from wich a determined
amount of light passes thru it and goes impress a photo-sensible material. As usualy in this
type of camera is used photographic paper insted of film (plastic), we are going to have
resulting a negative image. We can always turn the negative into positive, but you can enjoy
the negative as an image. Just since you like it. Either way, I'll teach you how to make
negatives positive.
Depending on the size of the box, the size of the image in the negative
is going to be diferent.
A great angle as a small focal length, therefore, we can obtain a great angle whith a small box (on the pinhole, a focal
length is the exact distance betwen the photo paper and the hole). If we have a long box, we obtain a teleobjective.
2. How to take this kind of pictures?
The list of material needed to take this kind of photos is:
Now, you just need to 'load' the camera. The photo paper is to be placed on the oposite site of the obturator.
I do it this way. With a little of paper adhesive (it's softer, so you don't ruin the paper), I place the photographic paper to back of the pinhole.
Remember that you are working with fotographic paper! I Shouldn't be saying this in this document, but you should only work with photographic paper under a proper red light (or brown), dry hands, etc., etc.
The exposing times need to be calculated by you. You can chose values like 30sec or 1min, to be easier to remember. But here, there are no way you can know that. You can even not know the exact time. You can expose how muck time you think it needs. I only set the general value, so you can guide your self for new photos. With Ilford RC, you can expose about 1min. Now remember! This is not a especific value. It will change from camera to camera. The big rule is to try as much you can. Only then you can have a better idea and value to a certain camera.
So that you can have a general idea, this value (the time) is a proportion of the size of the hole, the distance from the hole to the paper (focal distance), the type of the paper and the quantity of light present. All this (and perhaps other values) should be take under consideration to achieve the correct value of exposure.
In a more farfeched idea, you can even calculate f-stop value of the hole. When you have the correct time for the camera, you take a fotometer (a camera you have or even a real independent fotometer) and calculate the time for a determined f-stop. Then, you count all the necessary f-stops until you reach the time of the fotometer.
How you do it?
Simple!
Supose that the camera fotometer reads an f:8 for a time of 1/60s. If the pinhole register a photo with about 30sec, we just count the interval f-stops betwen times. In this case, there are 11 f-stops:
(1/60 - 1/30 - 1/15 - 1/8 - 1/4 - 1/2 - 1 - 2 - 4 - 8 - 16 - 32).
Now, you count 11 f-stops to the obturator:
(f:8 - f:11 - f:16 - f:22 - f:32 - f:45 - f:64 - f:90 - f:128 - f:180 - f:256 - f:360).
What do we get? A pinhole with an aproximated f-stop of f:360.
Now that we have calculated t camera f-stop, we can easiely calculate the time necessary to get the correct expsure. If you have a hand fotometer, just set the f-stop to the f-stop of the camera. If you don't have this option (because the fotometer just don't acepts it or you just have the fotometer of the camera), you just have to count the f-stops until you reach the f-stop of the camera.
As I said up in the text, the prior photo is a negative photo. So you can make it positive, you need to positivate the photo (duhh).
Now, this part already needs an enlarger, but is easier than you can think. Just place a photographic paper on the base of the enlarger with the emultion up. On the top of this paper you put the real photo (from the pinhole) with the emultion down. Expose the paper and see the results.
Very dificult, isn't it?
If you don't have an enlarger, you can try it with a simple lamp. I never try it, but the principle is the same and the result jus't isn't the same.
This is my (very) little adventure in pinhole photography.
I took about 2 (two) hours, since construction till the developed photo. Remember that I already know the times of developing. The developing takes some of our time, when you'r not used to it.
 This is the photo directly from the pinhole. The image is too bright, because I didn't left enough time to expose. I've increased the developing time, ending wiht a lot of contrast. |
 This time, I've made the positivation in the computer (photoshop), doing an invert and the flip-horizontal no photoshop. Here you can realy see the little time I left to expose. |
 Another photo from the pinhole. Here, you can see that the image is taken upside down. The true place of objects in the photo apears in the positive. |
 Same thing as previous. |
 30sec. |
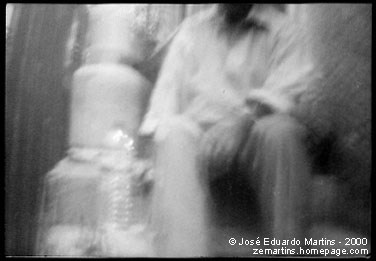 Now the images are difrent. You can note the quality of the images, aldough it's fuzzy. I still have not aplyed a tripod to the camera. |
 . |
 . |
 15sec. -1 stop diference. |
 This, (I think) has the correct exposure. 30sec. Still the problem of being shaky. |
 60sec. +1 stop diference. |
 My camera acused on the photometer a speed of 1/60s for a f:11. As the paper I used is diferent, I had to make new tests (about 60secs). The result... |
-f11.jpg) |
-f11-2.jpg) |